
How Different Tools Cut Wood
Understanding how different tools cut wood helps you choose the right saw for cleaner cuts and fewer mistakes. This guide explains common cut types, tool behavior, and when to use each for better results.
BASIC - MEASURING / CUTTING / SAFETY
Sawdust BuzzBlog Editorial Team Led by AJ “Buzz” Eichman
2/8/20264 min read
How Different Tools Cut Wood: What You Need to Know
Cutting wood is at the heart of every woodworking project. Getting it right means understanding not just the cut you need, but how your tool interacts with the wood. Over the years, I’ve learned that the tool and technique you choose can make the difference between a clean cut and hours spent sanding or fixing mistakes. This guide breaks down how various tools cut wood and when to use them, so you build skills that last.
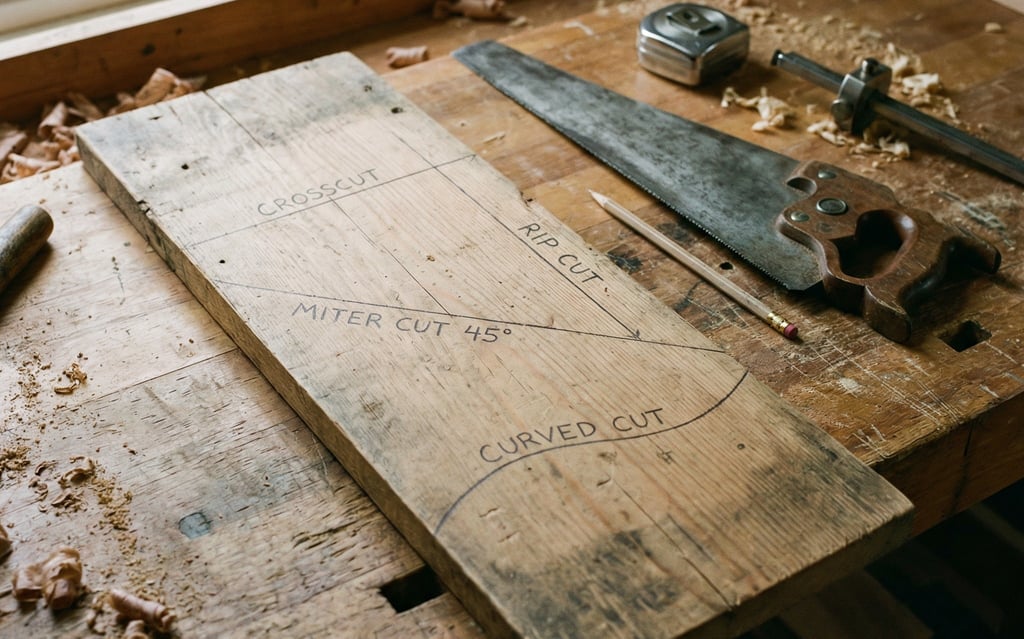

Understanding Basic Wood Cuts
Before you pick up a saw, you have to know what kind of cut you’re making. Using the right tool for the cut keeps your work clean and saves time.
- Crosscut: Cuts across the wood grain. This is how you shorten boards or trim them to length.
- Rip Cut: Cuts along the wood grain, for splitting or narrowing boards.
- Miter Cut: Angled cuts, often at 45 degrees, useful for frames and moldings.
- Curved Cuts: Non-straight cuts for shapes or patterns, usually decorative.
These distinctions aren’t just jargon—they help you pick the right tool and avoid tear-out or uneven edges.


Hand Saws: When Control Matters Most
Hand saws aren’t flashy, but they deliver control you often can’t get with power tools. I still reach for them when the job calls for finesse.
- Crosscut Saw: Teeth designed to cleanly slice across the grain. Best when sizing boards to length.
- Rip Saw: Larger, chisel-shaped teeth that cut with the grain. Good for breaking down boards.
- Coping Saw: Thin blade in a frame, perfect for detailed curves and intricate shapes.
- Backsaw: Has a reinforced spine for straight cuts in joinery like tenons or dovetails.
These tools demand a steady hand and some elbow grease, but the feedback you get helps prevent overcutting or crooked lines—something I learned the hard way.
Power Saws: For Speed Without Losing Accuracy
Power saws save you time, but they’re only as good as the operator. I’ve seen too many projects go sideways because someone rushed through a cut without proper setup.
- Circular Saw: A handheld workhorse for straight and angled cuts in plywood or framing lumber. Portable and versatile.
- Miter Saw: Great for quick, precise angled cuts—my go-to for trim and frame joints.
- Table Saw: The backbone of many shops, excellent for ripping long boards and crosscutting using fences or sleds.
- Jigsaw: For curved or irregular shapes in thinner wood; less precise but very handy.
- Bandsaw: Continuous loop blade, ideal for resawing, thick stock, and smooth curved cuts.
If you skip calibration or push these tools too fast, expect splinters, burn marks, or worse—kickbacks. There’s a reason I don’t cut corners on setup anymore.
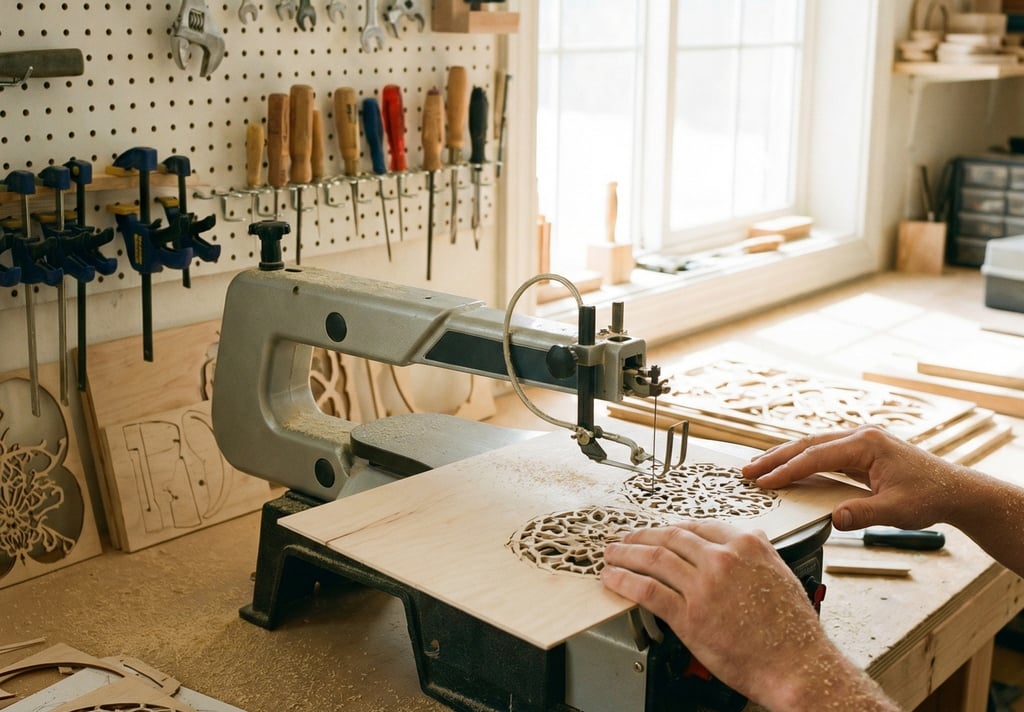

Specialty Tools: When the Job Calls for Finer Cuts
Some cuts require more than just power or a sharp edge.
- Scroll Saw: A powered coping saw for detailed patterns on thin stock. Not necessary for every shop but valuable for intricate work.
- Chainsaw: More for felling trees and rough cuts than fine woodworking. I wouldn’t recommend it for anything needing precision.
Choosing the right specialty tool can save hours of cleanup or outright fix a job that’s otherwise impossible.
Picking the Right Tool: What Works Best for You
There’s no one-size-fits-all answer here—your choice depends on:
- The cut type: Don’t use a rip saw for a crosscut and expect tidy results.
- Material thickness: Thick stock often demands a bandsaw or table saw.
- Precision needs: Miter and table saws are better for accurate, repeatable cuts; hand saws offer nuanced control.
- Portability: If you need to work on-site, a circular saw or jigsaw might be your best bet.
In my experience, knowing your tools—and their limits—beats chasing the latest gadget every time.
Common Slip-Ups I’ve Seen—and How to Avoid Them
- Using a blade or saw designed for the wrong cut type almost always leads to rough edges or tear-out. Ask me how I know.
- Dull blades cause burning, tear-out, and more effort. It’s worth keeping blades sharp; it saves time downstream.
- Forcing a saw through wood without support can cause kickback or jagged cuts. Take the time to support your workpiece properly.
- Skipping safety gear leads to injuries that slow your progress far more than taking precautions in the first place.
FAQs: Quick Answers from the Shop
** What’s the most versatile saw? **
I tend to lean on the circular saw for versatility. It handles straight, angled, crosscuts, and rips well enough if set up right.
** Which tools handle curves best? **
For curves, coping saws, jigsaws, scroll saws, and bandsaws are your friends. Each has its limits, but these cut shapes others won’t touch.
Glossary: Terms Worth Knowing
- Crosscut: Cut made perpendicular to the grain.
- Rip Cut: Cut made parallel to the grain.
- Miter Cut: Cut angled, usually at 45 degrees, for frames or trim.
- Coping Saw: Fine hand saw for detailed, curved cuts.
- Jigsaw: Powered saw with a reciprocating blade for curves.
Final Thoughts
Understanding how different tools cut wood isn’t just about technique—it’s about workflow, efficiency, and results that hold up over time. There’s value in standard methods that have proven dependable through years of mistakes and fixes. Whether you’re trimming a board with a hand saw or speeding through cuts on a table saw, choosing the right tool for the right cut is where craftsmanship begins.
In my shop, clarity and respect for the tools save hours of frustration. I hope this knowledge does the same for you.