
Infeed and outfeed space
Discover the essential role of infeed and outfeed space in your woodworking shop layout for safer, more accurate cuts and smoother workflow.
SHOP 1 - INTRO / SPACE /LAYOUT
Sawdust BuzzBlog Editorial Team - Led by AJ “Buzz” Eichman
2/12/20265 min read
Infeed and Outfeed Space: Shop Layout Fundamentals for Woodworking
Ah, woodworking shop layout. If you thought setting up your workspace was just about stacking some sawdust and hoping for the best, cue dramatic pause—think again. Today, we're diving into the unsung heroes of your shop: infeed and outfeed spaces. Yes, those magical zones that keep your wood from performing impromptu gymnastics mid-cut. Spoiler alert: ignoring these could turn your table saw into a drama queen.
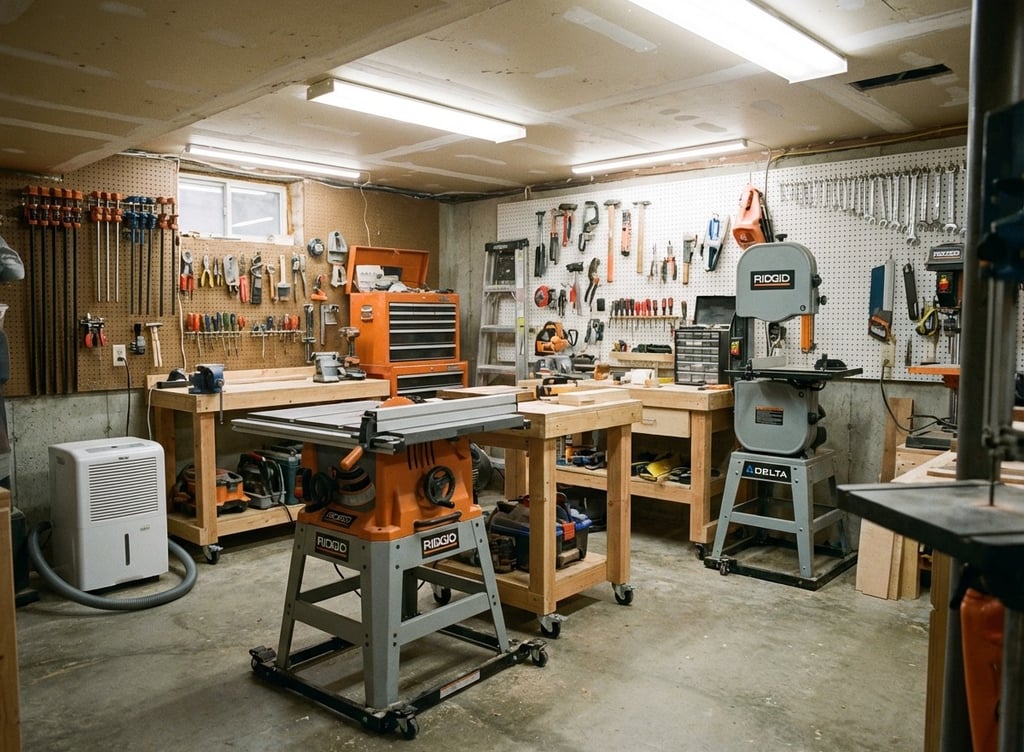
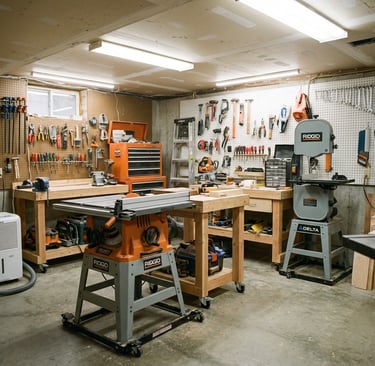
What the Heck Are Infeed and Outfeed Spaces, Anyway?
Alright, imagine feeding a slice of pizza into your mouth. The "infeed" is the approach phase — where the slice slides smoothly toward your eager maw. The "outfeed" is the aftermath — where the pizza (or workpiece) safely lands post-bite, ideally without falling on your lap.
Translate that to woodworking:
- Infeed space is the front yard of your saw where material gets gently nudged into the blade—without flying sideways like a confused penguin.
- Outfeed space is the friendly safety net behind the saw, supporting your freshly cut workpiece so it doesn’t faceplant or wiggle away like it’s auditioning for “Dancing with the Stars.”
Without these, you’re basically playing Jenga with heavy wood. Spoiler: Jenga loses.
Why Should You Care? AKA Why Infeed and Outfeed Space Is Your Shop’s MVP
Let’s be real — your woodshop is not a circus (but sometimes it feels like one). Properly planned infeed/outfeed space is the difference between smooth-sailing cuts and a wood-chip shower you didn’t ask for.
Here’s the rundown:
- Safety first! No one wants to field rogue pieces of lumber flying at face level.
- Accuracy-boosting magic: Unsupported wood tilts, which means cuts go from “precision masterpiece” to “abstract art.”
- Workflow flow: Because awkwardly wrestling with lumber is not a workout plan.
- Tool TLC: Less strain on your saw means it sticks around longer than your fad diets.
So yes, your future self will thank you for this.
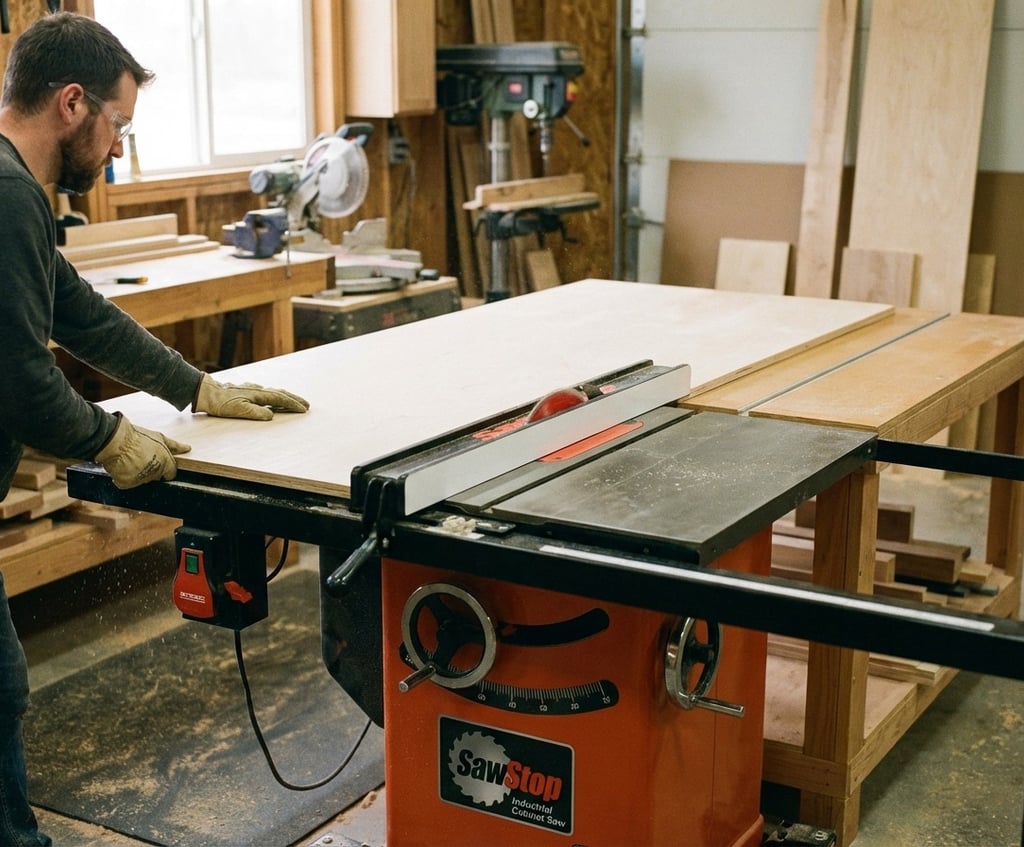
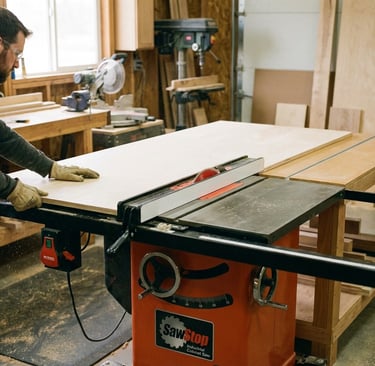
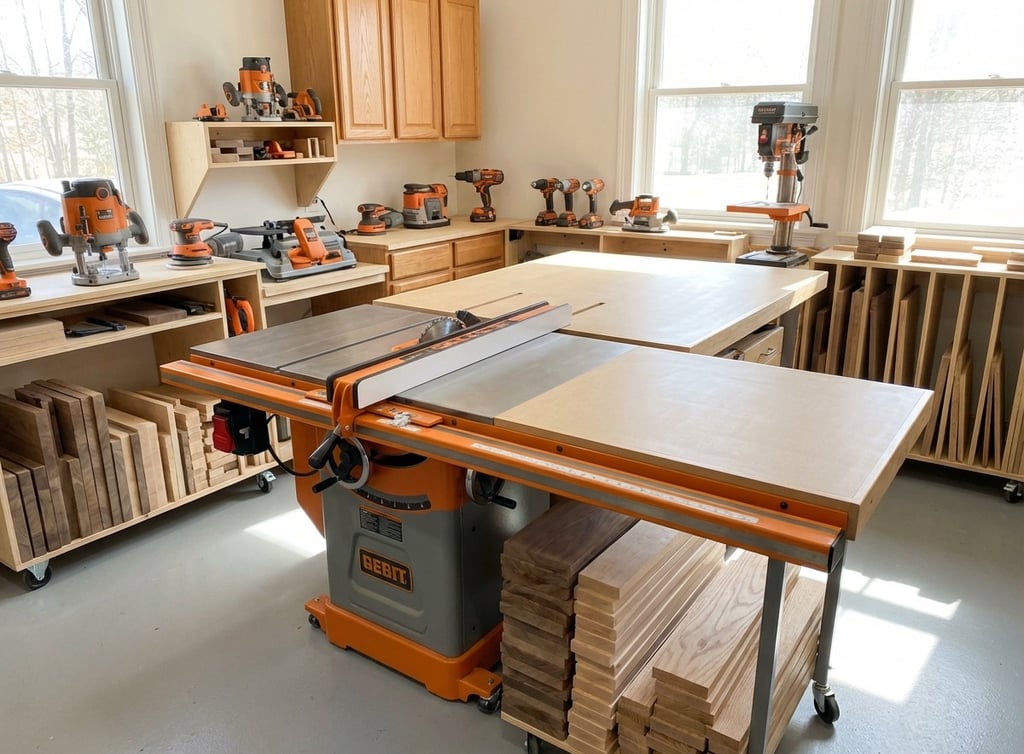
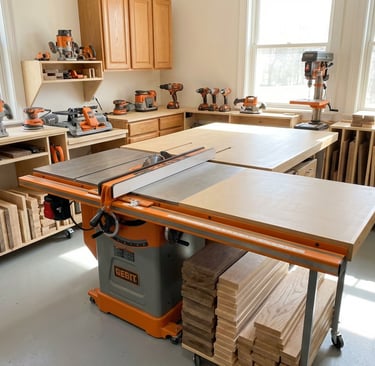
Size Matters — Optimal Dimensions & Height for Infeed/Outfeed
Pro Tip: Outfeed Table Height Is All About That 1/8 Inch Drop
Hot take coming in 3…2…1: Your outfeed table should sit about 1/8 inch LOWER than your saw’s surface. Why? Because that tiny dip stops the wood from catching on the edge like it’s trying to climb Mount Everest. Smooth exit = happy wood = happy you.
How Big Should These Tables Be?
- For ripping those 4’x8’ sheet goods (you know, your plywood showstoppers), aim for at least 48 inches of outfeed space. Don’t skimp here unless you enjoy rewinding every time your panel falls off a table.
- Match the outfeed width to your saw plus fence width. Stability is sexy, folks.
- Mirror that size and height for your infeed table, so your wood’s start-to-finish journey feels like a red carpet event.
Clearance: Give Yourself Room to Roam
Think of this like giving your lumber VIP backstage passes — leave about 36 inches of clearance in front and behind your tables so you can maneuver panels without performing a lumber limbo.

Flatness and Stability: The Unsung Heroes
Use a double-layer of 3/4″ MDF or get fancy with a torsion box construction (fancy term for “super sturdy, flat support”). Your wood hates warping surfaces more than I hate Monday mornings.
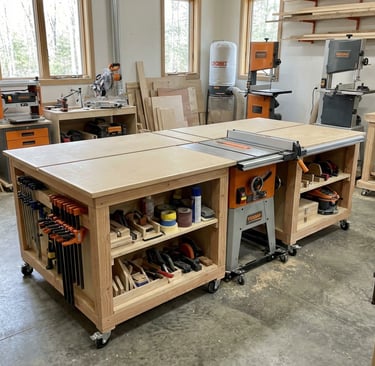
How to Build Your Infeed and Outfeed Tables Without Losing Your Mind
Materials: The MVPs
- MDF or plywood rule the roost — MDF wins for smoothness (aka no annoying bumps that make your wood unhappy).
- Go torsion box if you’re fancy and want your tables to stay flat, rigid, and ready for heavy lifting.
Convenience Features: Because You’re Not a Robot
- Flip-up outfeed tables on casters: Roll ‘em out for action, tuck ‘em away for chill time.
- Drawers or shelves underneath: Stash tools, accessories, or the laminate scraps you keep promising you’ll use “someday.”
- Modular or collapsible wings: Small shop? No problem. Save space without compromising your infeed/outfeed game.
Smart Shop Layout Tips to Keep Your Sanity (and Lumber) Intact
- Cramped space? Push your saw against a wall, then pamper it with infeed/outfeed tables sticking out like loyal bodyguards.
- Large shop? Make your saw a central island — a cutting fortress, with infeed and outfeed tables on all sides. Efficiency + drama-free workflow = win.
- Dust collection: Make sure the suction hoses don’t trip you or fight for the same real estate as your lumber.
- Flow is king: Stock storage > cutting > assembly > finishing. The fewer back-and-forth trips, the better.
Rookie Mistakes That’ll Have You Facepalming (Learn From Me)
- Outfeed tables so huge they eat your shop space like a black hole. Don’t overdo it.
- Matching outfeed table height exactly to the saw surface — noooooo, that 1/8 inch drop is non-negotiable.
- Flatness failure. Flimsy tables = wobbly cuts = tears.
- Ignoring space for your long boards to stretch out. Your lumber deserves legroom.
FAQ (Because You’re Curious and That’s Cute)
Q: How much outfeed space do I need for sheet goods?
A: At least four feet (48”) so the full panel is supported and not doing the limbo-twist.
Q: Should my outfeed table be flush with my saw’s surface?
A: Nope, aim for that sweet 1/8 inch drop. Think of it as a comfy exit ramp, not a speed bump.
Glossary for the Woodshop Newbs
- Outfeed Table: The patient buddy behind your saw catching and steadying workpieces after the cut.
- Infeed Table: The courteous usher in front that guides your lumber onto the saw stage.
- Torsion Box: Fancy sandwich for a table surface — a grid framework hugged by flat skins, making your table strong and flat like a pro wrestler’s bicep.
So there you have it — infeed and outfeed spaces are like your shop’s backstage crew: not always in the spotlight, but absolutely essential for the show to go on. Nail these, and your cuts will thank you and keep your fingers intact (mostly).