
Measuring & marking
Master the essential measuring and marking techniques in woodworking that ensure precision, save materials, and elevate your craftsmanship skills.
PROJECT BLOG 2 - HOME / TEACH / DIFFICULTY
Sawdust BuzzBlog Editorial Team - Led by AJ “Buzz” Eichman
2/9/20265 min read
Measuring & Marking: Why the Project Matters
Why Measuring and Marking Matters in Woodworking
Alright, let’s set the scene: you’re ready to chop some wood, channeling your inner Bob Vila, but cue dramatic pause—your tape measure might as well be a spaghetti noodle. Ever heard “measure twice, cut once”? It’s not just a catchy phrase for your grandpa’s workshop; it’s basically tattoo-worthy wisdom for woodworking.
Think of measuring and marking like the GPS coordinates in your “build-it-yourself” treasure hunt. Skip the precision, and suddenly your dovetails look more like awkward high-fives. Miss the mark and you’ll have fences flying, boards crying, and wasted lumber begging for mercy.
Here’s the kicker: it’s about more than just getting fit joints. Mastering this is like learning the Jedi mind tricks of woodworking—boosting patience, spatial awareness, and your ability to strategize like a boss. And trust me, those skills don’t just help in the shop. They sneak into your real life like ninjas—helping with everything from assembling IKEA furniture without tears, to nailing that eye-roll-worthy perfect grocery list.
Takeaway: If woodworking’s your game, measuring and marking are MVPs in your lineup. Ignore them, and boom—project catastrophe. Respect them, and you build like a craftsman-prodigy.
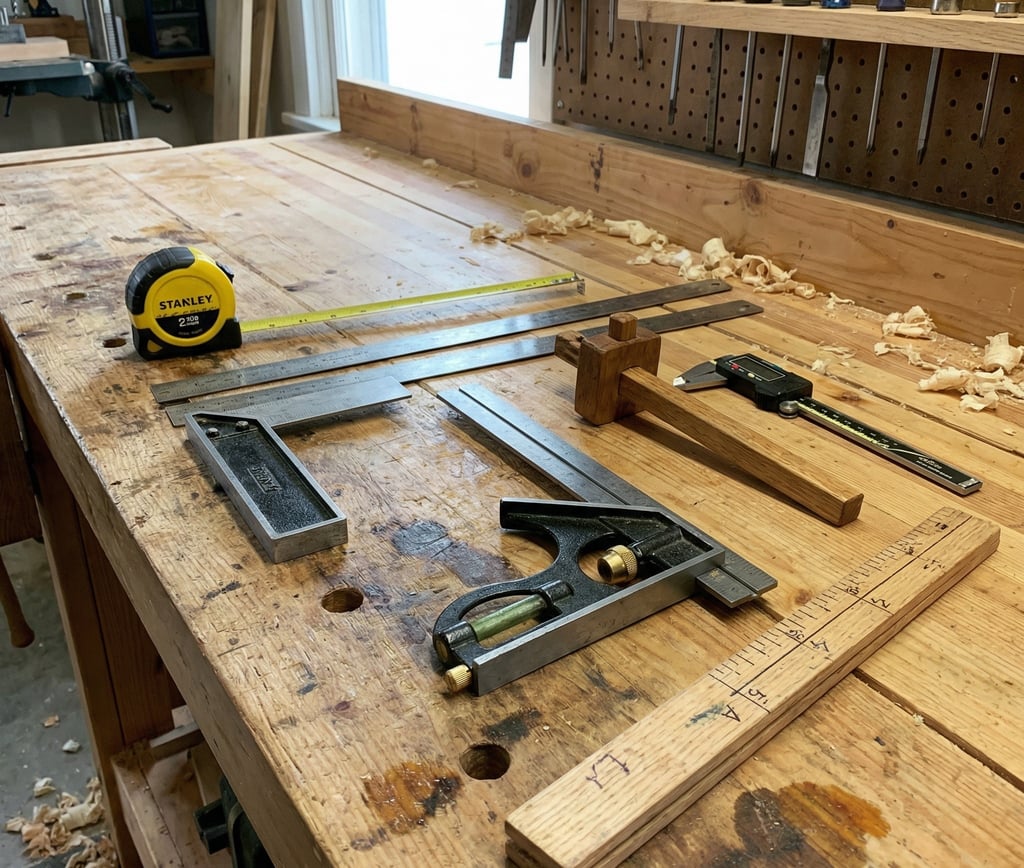
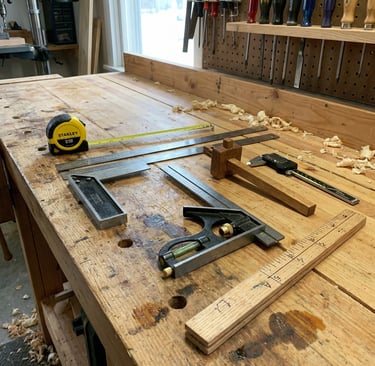
Essential Measuring Tools for Woodworkers
Now, before your eyes glaze over like you just found a lecture on paint drying (or worse, audit tools), let’s talk gear. A quality toolkit doesn’t just make you look the part—it saves your sanity and leftover scrap wood.
- Tape Measure & Rules: Your go-to speed demons for rough cuts. Like that quick text you send while multitasking. But don’t get too comfy!
- Combination Squares: The Swiss Army knives of measurement. They check 90° and 45° angles, peek into depth, and pinpoint centers. If they had a Tinder profile, it would say: “Long walks on benches, loves right angles.”
- Try Squares: They keep it simple — just your trusty right angle friend. Maybe not flashy, but 100% reliable.
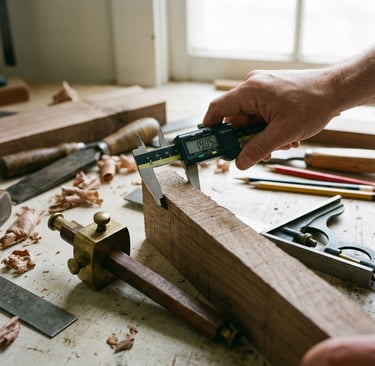
- Calipers and Dividers: For when your precision game needs to switch to “ninja mode.” Measuring minuscule distances without breaking a sweat.
Invest in honest-to-goodness tools. If your measuring job is spot-on, your project looks like a million bucks. Skimp on tools, and your wood screams “amateur hour.”
Takeaway: Tools don’t build a project, but they sure cheat death in the workshop.
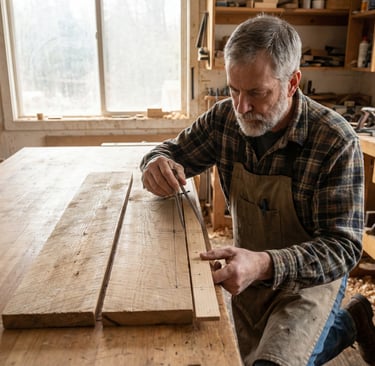
Marking Tools and Their Specific Applications
Alright, you’ve measured—now it’s time to mark like a pro (not like your kid's first attempt at decorating the walls). Marking is more than scribbles; it’s the blueprint for your future masterpiece.
- Marking Gauges: These bad boys scribe lines so thin, even your tiniest paintbrush couldn’t cover ’em up. They keep marks parallel to edges—like drawing invisible laser lines to guide your saw.
- Marking Knives: Forget pencils—they slice precision into your wood. Sharp, fine grooves keep your saw blades marching to your beat instead of wandering off to “freestyle” in the grain.
- Pencils (Mechanical or regular): Good for general layout, but don’t let those dull nubs fool you. Sharpen your pencil (and your skills) to keep those lines crisp.
- Chalk Lines: When you gotta mark BIG and long, chalk’s your friend—big, bold, and in charge.
Pro tip: Using a marking knife instead of a pencil isn’t just fancy—it’s smart. Less smudge, more precision, fewer “why is this not fitting?” meltdowns.
Takeaway: Marking tools are your secret sauce—choose wisely and your saw will sing.

Techniques for Accurate Measurements and Marks
Ok, so you have your fancy tools, but do you know how to use them right? Here’s where skill meets sass:
- Light Touch with Marking Gauges: Don’t choke the tool like it owes you money. A gentle, steady ride along the edge lets the scribe pin do what it’s meant to—carve crisp lines.
- Tick Marks Are Your BFF: Instead of drawing heavy lines all over your board (seriously, who taught you that?), start with those neat little tick marks at edges. Then connect with a straight edge like a pro.
- Double-Check Everything: Yes, again. Because “measure once, regret forever” is a tragedy nobody deserves.
- Color Code Like a Patient Teacher: Create your own mini language of marks — colors and symbols to keep assembly as painless as possible.
Practice these, and you won’t just build wood—you’ll build trust with your tools and materials.
Takeaway: Precision is 90% habit, 10% caffeine. Nail these habits to save headaches.
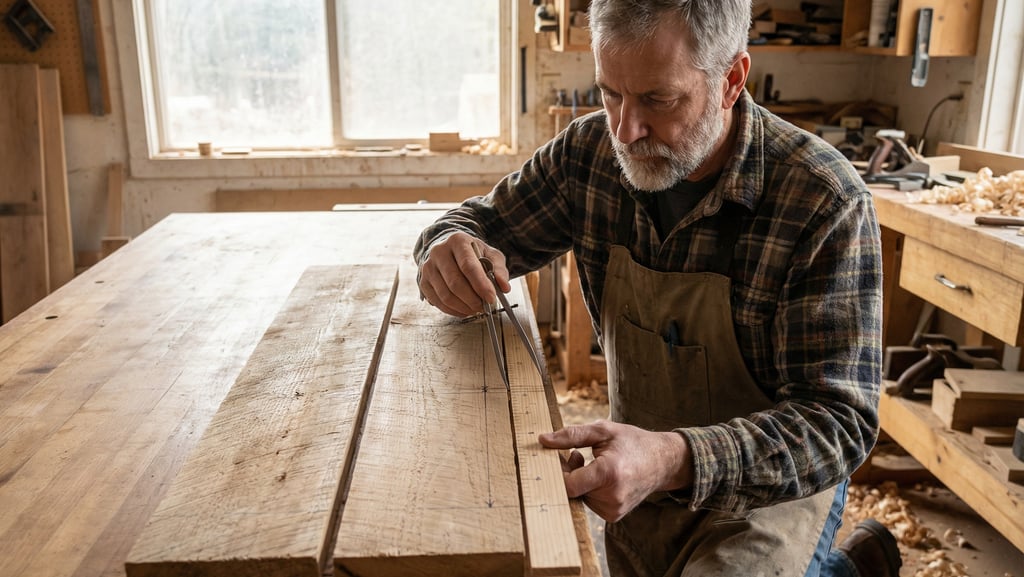
Transferring Measurements Between Workpieces
Ever try to clone your project parts perfectly and ended up with Frankenstein’s monster furniture? Welcome to the struggle of transferring measurements—where most newbies break down.
- Story Sticks: This is old-school but gold-school. A wooden “cheat sheet” that records exact measurements you can transfer over and over. Think of it as your project’s memory bank. Perfect for cabinets, drawers, or anything requiring repeat greatness.
- Dividers: These little compass-like tools let you “step off” intervals from one piece to another. It's like a measuring tape that moonlights as a magic wand.
- Marking Gauges: They do double duty here — consistency, consistency, consistency.
Master these, and watch your workflow go from “trial-and-error” to “look-at-me-I’m-a-woodworking-god.”
Takeaway: The secret to uniformity is not luck; it’s smart measuring mojo.
Common Measuring and Marking Mistakes to Avoid
Listen up, this is the part where I say something you promise to do but totally don’t—because you’re busy just wanting to saw already.
- Only riding the marking gauge on corners instead of a full edge — this is like trying to balance on one pedal of a bike… not stable.
- Using dull marking tools — seriously, a blunt knife is about as effective as a butter knife in a gunfight.
- Pencil lines so thick they could double as runway lights — precision? Nope.
- Skipping the cross-check before cutting — the DIY equivalent of “hold my beer.”
- Assuming your first piece is a perfect template without measuring again — rookie mistake alert.
Avoid these and your scrap pile will thank you.
Takeaway: Mess-ups are inevitable, but these blunders? Easy to dodge with a little care.
What Skills Do Projects Teach Beyond Measurement?
Hot take coming in 3…2…1: Measuring and marking are basically homework with power-ups.
- Problem-Solving & Planning: When your angles don’t add up, you learn to cook up creative solutions instead of blaming gravity.
- Patience & Focus: Ever tried holding a sharp knife steady while your toddler is screaming? Yeah, woodworking builds attention muscles you didn’t know you had.
- Confidence & Self-Reliance: Before you know it, you’re the kind of person who can eyeball a joint and say “nailed it.”
- Tool Mastery: Frequent measuring breeds familiarity — soon you'll be whispering sweet nothings to your combination square.
- Quality Awareness: You start spotting tolerance levels like a hawk—not everything has to be perfect, but some things really should be.
In other words, ‘measuring and marking’ classes are life lessons masquerading as workshop tasks.
Takeaway: These skills aren’t just about wood—they’re about sharpening your whole craft-game mindset.
FAQs
Q: Marking knife versus pencil—why does it matter?
A: Because a marking knife cuts a crisp groove that pencils only dream of. It guides your saw blade with laser focus, unlike pencil marks that smudge faster than your morning coffee spill.
Q: How do I find the center of a board accurately?
A: Easy! Use a combination square or marking gauge to measure from both edges. When those marks shake hands in the middle, you’ve got your centerline—a critical VIP for balanced joints.
Q: What’s a story stick and when should I pull it out?
A: It’s basically the “cheat code” for repetitive measurements. Perfect for cabinetry or furniture where identical bits need exact repeatability. Like a secret handshake for woodworkers.
And yes, this will be on the test.